In these projects it feels like at least half of the job is battling my counterproductive tendencies, I was a bit impatient to get the handle on the throttle to start using it day to day to test it and figure out the layout of the controls etc, and in my haste I forgot some of the basic tenants of 3d printing design; keep the printing orientation in mind so that you don’t end up with massive overhangs and a lot of supports, keep it modular and tweakable to not end up with huge unusable pieces. Which is how I spent many hours making this thing:


It’s very pretty, and it might actually work perfectly fine, but if there is anything wrong with it that’s a lot of plastic and 15h~ down the drain, maybe several times, I did have a good idea though, the red sections are just colorized to stand out, they’d also be white plastic, but they represent a modular solution, instead of figuring out the perfect ergonomic layout of buttons, analog sticks, etc on the first try the modular panels would let me experiment, and possibly even pretty quickly hot-swap modules for different games if needed. But it still means the main body is a beast to print and engineer.
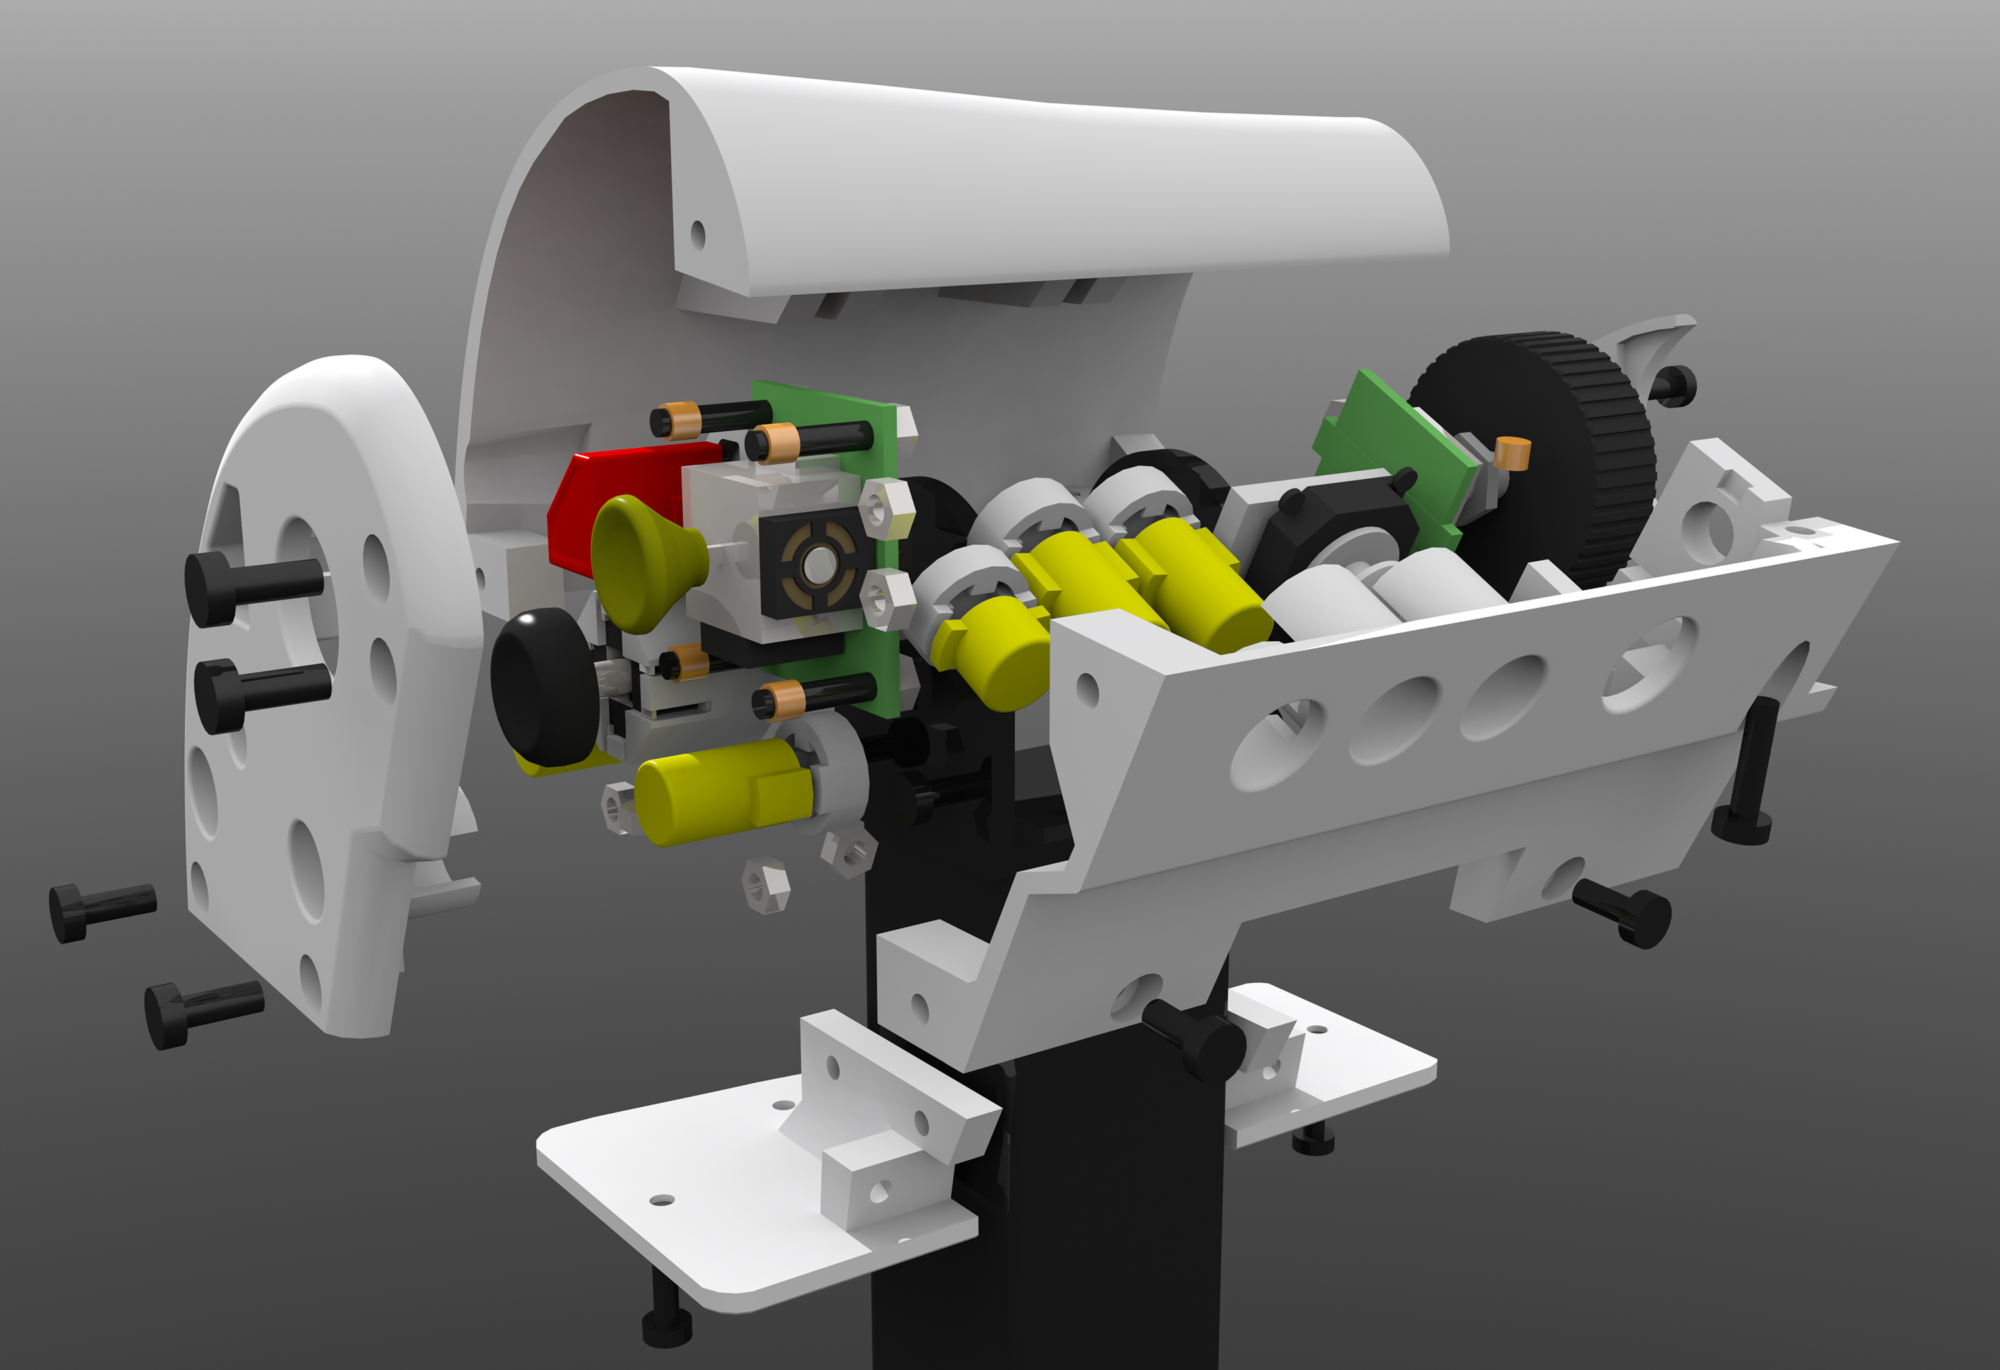
I’m taking some steps back, luckily I always save incremental versions of my designs, so I’ll step back to before I made the panels and instead I’ll make the entire handle modular instead of having panels, back and top where your hand rests is one part, left and right ends are a part each, front is a part and bottom is a part, though I might leave it out, not needed for cosmetics but might be for strength. This approach is a lot more forgiving to design, print, modify etc and is even more modular, I was worried about fitting larger mechanisms like analog sticks into the relatively small gap and shallow space behind the panels, while this solution doesn’t afford more internal volume (I’d have to print it blue to make that happen) I can compensate better in other ways, like shift it around, perhaps make it protrude a bit etc. Also makes it much easier to tinker with, which is one of those things you can overlook when designing something like this, I need access to the interior in various places to connect cables, tighten screws etc, old design would be an absolute nightmare to work inside since it’s almost completely enclosed, this design I can just unscrew one or more sides and have complete access.
Only piece of the puzzle haven’t been able to picture clearly yet is what the screen arm actually attaches to, considering making it attach to the palm rest part, they’re almost touching and the palm rest is the part that needs the most support (because you’re resting your hand on it), then the 3/4 other panels would mount to the palm rest and each other.
The shape is time well spent though and I’m happy with it, the changes from the basic profile of the x55 should be pretty clear, scales in various ways along it’s length, larger closer to the thumb side and narrower at the pinky side, took a lot of time and learning some new tools to achieve that, basically I re-scaled parts of loop slices along 5 points along it and then used modo’s smoothing tools to extrapolate a curved shape. The polycount got pretty extravagant at one point an I had to pull that back a bit, hit 30k polygons with interior and exterior, got that back down to 5k with most of that on the exterior, simplified the interior a lot to make Boolean operations (adding, removing geometry) a lot faster and less prone to causing holes.
Main reason why I posted this is because I think it’s important to show that going down the wrong fork in a design process, figuring out you did and then try alternatives is part of the process. Some people might hold back these failed forks but I think it’s both interesting to see “what if” versions and to make it clear to people interested in getting into making/DIY/design of various kinds that “failure” isn’t the end of the process, it just means you need to take two steps backwards, one to the side and then continue knowing you’ve got less traps ahead of you.
Here is some progress on the new approach:


And here with the main hand-rest part hidden to reveal the inside:

Yeah I haven’t cut a hole for the screen arm yet (because I’m still working on where it goes exactly) and I haven’t designed the internal screw brackets etc to make it assemble, that is next on the agenda, but with this change I have a much clearer mental picture of the steps I need to take to get where I want to go, was getting muddled before and made me finally re-evaluate where I was going.
Quick WIP of the screw placement:
